


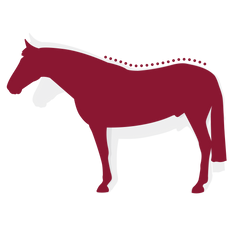
Conformation Design
High Wither

Key fitting concerns
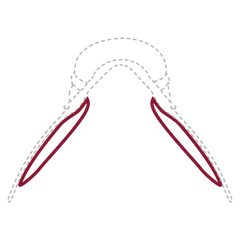
Clearance of the spine without pinching and saddle balance

Wither heights & back shape
Prominent wither and slender bodied

Key saddle features
Deep front and rear gussets ensure good wither clearance
Standard Wither
Key fitting concerns
Relatively easy to fit but bearing surface should be maximised

Wither heights & back shape
Medium wither and average build

Key saddle features
Standard depth gussets provide a balanced fit
Low Profile

Key fitting concerns
Saddle stability and minimising bulk between horse and rider

Wither heights & back shape
Low withered, flat backed and big barrelled
Key saddle features
Slim-line rear and front gussets give a low profile fit